Aircraft Maintenance: Oil cooler maintenance and repair
In a perfect world, all of the fuel energy used by an engine would be transformed into the work it outputs. Alas, we do not live in a perfect world…at least not when it comes to engine efficiency. The reality is that the majority of the chemical energy contained in avgas doesn’t ultimately propel us forward. It is lost to friction and heat before it even makes it to the propeller.
That heat needs to be dissipated, and there are limited options to accomplish this:
- Cool the outside of the engine (air or water cooling);
- Cool the oil (oil cooler);
- Cool the combustion chamber (excess fuel).
Unless there is a leak, a crack, or a serious problem with oil temperatures, oil coolers rarely get any maintenance attention. That’s too bad, because they are a critical component in the health of the engine, and they become less efficient over time as carbon, oil sludge, varnish, etc. reduce the heat conduction between the metal cooling tubes and the oil passing through the cooler. The end result is that the typical oil cooler gradually declines in efficiency until some specific failure causes them to get the attention they deserve.
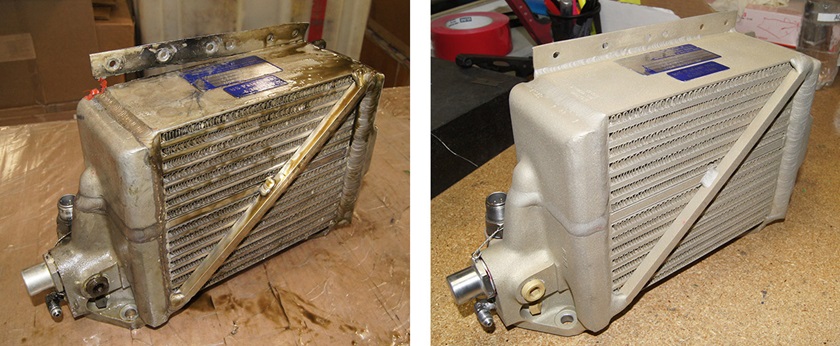
That’s exactly what happened in my case. I was recently down in Fairhope, Alabama, at Continental Motors Services getting the cylinders replaced on SocialFlight’s A36 Bonanza (more on that story coming soon). As part of the cylinder replacement work, the Continental team did a very thorough inspection of the associated components in the engine compartment. One of the items that they discovered was a large crack in the mounting flange on my oil cooler. Thus began my personal education about oil cooler overhauls and my introduction to Wayne Thomas, senior sales and technical advisor at Pacific Oil Cooler Service, Inc.
Pacific Oil Cooler Service is a household name in the oil cooler business and was my first call once I knew that I had to get my cooler repaired. Thomas explained that rather than repair the flange, it was standard practice to completely overhaul the cooler and repair it in the process. The complete overhaul process was impressively detailed and Thomas sent me pictures of each step along the way. The basic process is as follows.
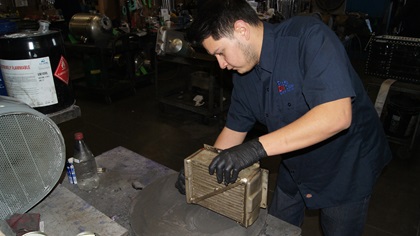
- Upon arrival, the cooler gets an initial inspection performed by shop foreman Frank Sierra. Obvious repair needs are noted and green tags are attached to identify the parts (oil cooler, vernatherm, etc.).
- The technician (Jorge Ayala, in my case) engraves the work order number, part number, and serial number on the oil cooler.
- The oil cooler on the Continental IO-550B is mounted directly to the engine. So, it’s imperative that the gasket surface and the attachment surface of the mounting foot are parallel and free of marks that could prevent a good seal to the engine case. Blue machinist’s dye is applied to the gasket surface and the mounting foot of the cooler, and the cooler is lapped on a plate using fine grit lapping compound. After a few swipes across the lapping plate, it is confirmed that the gasket surface is flat and undamaged—and the mounting foot is in alignment with it.
- The threaded holes are cleaned and capped off, and the leak-test plate and hoses are attached to the cooler. Smooth-faced jaws on the bench vise prevent damage to the cooler. This is the only direction an oil cooler is strong enough to be secured in a vise. Apply pressure to the cooler in any other direction and it will damage very easily.
- The oil cooler is submerged in hot water and checked for bubbles. The air pressure begins at 0 PSI and is slowly raised to 100 PSI while the oil cooler is observed for leakage. Some leaks will appear at 30 PSI and not at 80 PSI, so it is important to cover the whole range.
- Air is purged from the oil cooler with water, in preparation for ultrasonic cleaning. Ultrasonic waves are only transmitted by liquid, so all of the air must be removed from the inside of the cooler. The coolers are then placed into one of two ultrasonic cleaning machines that Pacific Oil Cooler Service operates. Ultrasound does in 25 minutes what used to take 14 hours using the old caustic chemical method.
- Part of the overhaul process includes checking the vernatherm, the mechanical thermostat valve that controls oil flow through the cooler. The vernatherm length is measured at room temperature and the length noted on the green tag, down to the thousandth of an inch. The vernatherm is then heated in an oven at 180 degrees Fahrenheit for 20 minutes—and measured again while hot and the length noted on the green tag. The vernatherm on the Continental IO-550B needs to extend a minimum of .180 inches over its room temperature length to be declared functional.
- After the ultrasonic session, the soapy water is drained from the cooler and the coolers are installed into a shielded flushing bench. Stoddard solvent is flushed through the coolers at roughly 80 gpm, reversing direction of flow every 60 seconds, for eight hours. This is the first of three different flushing machines that every oil cooler will spend time on. The vigorous nature of the flushing causes the solvent to become very warm and the temperature must be monitored. The different flushing machines have progressively cleaner solvent and filtration as the cooler gets cleaner in the process. In the case of my cooler, come pieces of rubber hose and carbon came out, but no metal particles. Another testament to the importance of replacing your hoses (and the topic of another article).
- After the flushing, pressure testing is complete, and it’s time for the weld repair to the original “cause” for sending my oil cooler into Pacific Oil Cooler Service in the first place. The oil cooler is carefully bead blasted with aluminum oxide and glass bead, and the cracked flange is TIG welded.
- Iridite is a hexavalent chromate conversion treatment that provides corrosion resistance. This treatment is the same that was applied to the oil cooler when it was manufactured new.
- Fin straightening is performed on an as-needed basis using dental instruments and shaved down pliers. There are no automated tools for performing this tedious—but necessary—function.
- The final inspector inspects for cracks, any missing attachments, and verifies that all steps of the overhaul and recertification process have been completed. Once inspected, the shop foreman will issue a dual release Form 8130-3.
After this comprehensive process, my oil cooler looks brand new. Special thanks to Thomas for his detailed explanation of the process steps and the great photos. I now have much more than just an “airworthy” oil cooler; I have one that is stronger at the point where the original crack occurred and, more importantly, has the “as new” efficiency required to handle the hottest summer day. Of course, it’s snowing now in Boston…but warmer days are bound to come eventually. Until next time, happy flying!