Sharpen your drone stills
Like most anything else, you will find the best aerial photography comes from a combination of practiced skills and good planning.
While it may be fun to just go out shooting things at random, if you want the best results you need to put in some preparation.
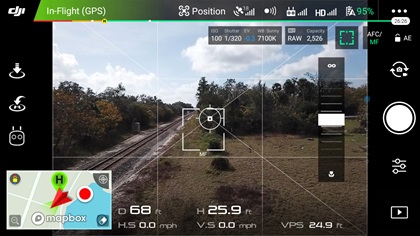
Practice will help you gain confidence and comfort while flying and shooting photos simultaneously. Start off by diving into the camera controls of your flight app with your drone on the ground. Always be sure to remove your gimbal guard prior to powering up your drone or camera to avoid damage.
Once you are all powered up and connected you can start playing with the camera settings.
Most systems default to “automatic” settings, and the computer will do its best to take the best photos with minimal input. You can switch to manual settings to take full control of the camera. While this offers more advanced options, it requires an understanding of photography fundamentals such as exposure, shutter speed, white balance, and other considerations.
Before you power up in the field, take a little time to plan your shot list. If you are going to shoot a house or building, your angles and altitudes may vary quite a bit from shooting, say, a beach or other landscape scenery. If you have a good idea of what you want to shoot before getting in the air, you can maximize your battery life while getting the photos you want.
“What does this mean?”
You may have already come across lots of unfamiliar terms such as exposure, high dynamic range (HDR), exposure bracketing, and zoom. The more you experiment with these techniques, the better you will understand how each works.
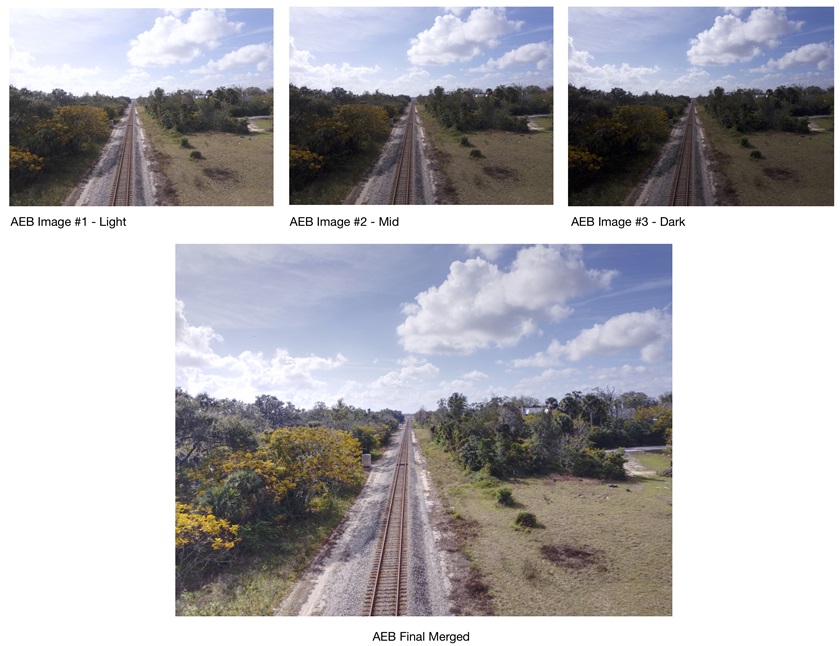
Exposure is important to consider with drone photography. It differs a bit from ground level photography since you are flying at an elevated height and you will typically be capturing a good portion of the sky. Depending on the brightness of the sun, this can throw off the dark/light balance and make the sky look “blown out” or too bright. This is where HDR or auto exposure bracketing (AEB) is useful. HDR and AEB are similar techniques, and many popular drone makers offer these options in the camera settings. Basically, these options quickly take a series of photos at different exposure settings. If you look at them individually, some may be very dark while others may be very light, and some will look fine. The right photo editing software such as Adobe Lightroom or Affinity Photo for iPad can perform the magic to take the best parts of each image and merge them into one beautiful result. No more washed-out skies or details lost in dark shadows with this technique.
Don’t forget about neutral density (ND) filters. Think of these like sunglasses for your drone’s camera. Common ND values run from ND4, ND8, and so on, progressively getting darker. These allow the shutter to stay open longer, capturing a bit more detail while also enhancing the color saturation. Normally, you will use a darker ND filter for the brightest conditions; however, there are special effects that be achieved using different filters on other lighting conditions. Experiment with your creativity!
Good composition
Once you have a handle on the basic settings, it’s time to think about composing your shot. Think of composing as getting everything you want in the shot, and arranging the visual elements to please the eye.
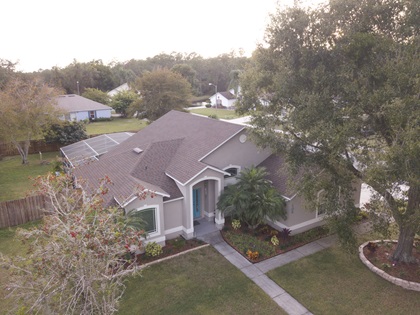
One helpful tool that works well in many cases is the “rule of thirds.” Imagine your canvas divided into three horizontal and vertical sections with your primary subject closest to the center square. Drone photography in particular benefits from rule of thirds since, as we mentioned earlier, the sky is usually in the upper part of the shot. In the example below you will see how the sky is in the upper third, the main body of the shot is in the middle, and the ground is in the lower third.
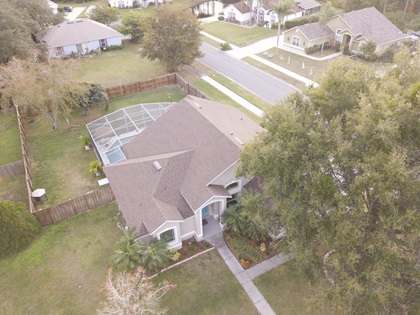
And just because you are flying a drone, don’t think that higher is always better. Sure, shooting landscapes and other natural settings can benefit from higher altitudes. But if you are shooting something like a house or building the key is to be subtle. You want to keep the subject in perspective and not necessarily call attention to the fact that a drone took the picture.
Lastly, consider your background or foreground and avoid distractions such as telephone poles, moving cars, or anything that will draw attention away from your subject.
Panoramas
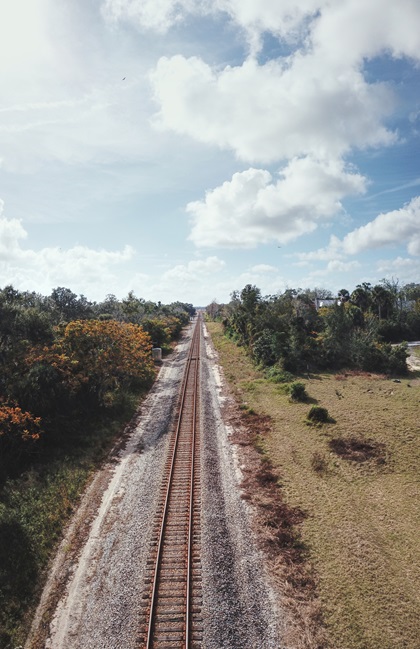
You are probably familiar with panoramic images. This is where a number of horizontal images are stitched together to create a sweeping left-to-right dramatic view. Panoramas are spectacular for those beautiful sunsets or wide-area shots, but did you know that you can also do a vertical panorama?
A vertical panorama gives you the option of creating an image that looks up and into the distance. A beach would be a good example, where you want to capture the long expanse laid out forward and ahead. Another use for vertical panoramas is for, well, vertical subjects such as tall buildings. A vertical panorama of a few images would give you that incredible view.
Editing and post-production
One you complete your flight, pop that SD card out of your drone and into your computer or iPad and get to editing. Good editing can take a so-so photo and make it shine. Look around at some pro photos online and study how they are cropped, shooting angles, and the lighting and color saturation. Try to avoid too many gimmicks such as drop shadows, unnecessarily oversaturated colors, and other distractions. While there is always an artistic quality to some special effects, there is also an appropriate time and shot to use them with.
Professional commercial photography, such as taking real estate shots, requires good clean shooting. The idea is to highlight your subject rather than how many fancy tricks you can pull off.
Some basic editing can be done with built-in tools such as Photos on a Mac or iPad. For even better control you can opt for something more advanced like Adobe Photoshop or Lightroom. Pixelmator and Affinity Photo for iPad are also inexpensive winners to consider. These also take a bit of learning so plan some quality time handling editing tasks.
Flying a drone is an incredibly rewarding experience in many ways. With the amazing cameras on today’s models you have the resources to capture photos and videos as never before. Don’t be afraid to experiment and have fun with taking and editing your photos. But remember, practice makes perfect, or gets you closer anyway. Even on those rainy no-fly days, you can still work on your shooting ideas and many other elements without ever leaving the ground.
Terry Jarrell
Related Articles