Aircraft Maintenance: The art of engine, cylinder break-in
Whether you are dealing with a completely new engine, or just a new cylinder, how you conduct those first few hours of operation can affect your safety, your wallet, and the long-term success of your engine.

Engine overhauls and cylinder replacements are to be expected during the life cycle of aircraft ownership. What makes this type of work unique is that, once the wrenches stop turning, the final stage of the installation process involves running the engine, flying the airplane, and “breaking it in.” This is where the work that you do, as the owner of the aircraft, can make the difference between a successful project versus an ongoing problem.
Things become more complicated where cylinders are concerned. In most parts of the engine, oil is utilized to minimize the contact between components through hydrodynamic or boundary lubrication (depending on the application). Cylinders, however, present a different (and much more consequential) challenge. The goal of the cylinder is to contain the energy from combustion and turn it into mechanical work. Engine designers want to create as perfect a seal as possible between the piston and the cylinder wall, yet also reduce friction as much as possible. Cylinder break-in is the process of finding the balance point within the competing goals of sealing and friction.
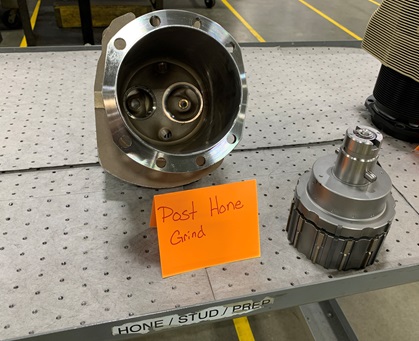
If the walls of a cylinder were perfectly flat, a metal piston ring could (theoretically) form a perfect seal against it. However, there would be no way to keep a boundary layer of oil in place between them and the result would be constant scraping, friction, and heat. To prevent this, steel cylinders are manufactured with a hone pattern that creates peaks for the rings to ride against and valleys to hold oil. Similarly, nickel cylinders have a microscopically rough surface finish, and chrome cylinders have a “cracked” appearance with channels that hold the oil.
Regardless of the cylinder wall material, the break-in process begins with two surfaces (wall and rings) that need to wear into one another to break down the sharpest edges to create the perfect balance of plateaus and valleys (instead of peaks in the case of steel cylinders) to retain just the right amount of oil for lubrication while still providing good sealing qualities. Steel cylinders are the most common, with rings that are harder than the steel, focusing the break-in process on wear in the barrel. Nickel and chrome, in contrast, focus more of the break-in process on wearing the rings to fit the barrel. Regardless, the basic method and risks are the same: Perform a controlled-wear process to achieve the mated fit as quickly as possible without overheating the cylinder or burning the oil and coating or clogging the surfaces (glazing).
Piston rings are shaped to exert increased pressure against the cylinder wall in reaction to increased pressure within the combustion chamber. The equation looks like this: More power creates more force between the rings and walls and accelerates break-in. This is why almost all engine manufacturers’ recommended break-in procedures specify high-power operations until break-in is completed.
Before we get into the particulars of process and procedures, I need to stress that it is critical to follow the manufacturer’s specific break-in procedures without variation. This is especially important to preserve your warranty rights from the engine manufacturer, overhauler, or cylinder manufacturer. You want to get the process right in both a practical and legal sense in order to protect your rights. In most cases, it is invaluable to have digital engine data throughout the process and to document your oil use and flight profiles for your records.
First flight preparation
Nearly every manufacturer/overhauler recommends avoiding prolonged ground runs and idling prior to the break-in flight. However, it is critical to ensure that your fuel system is properly set-up and calibrated before taking that first flight. Therefore, ensure that you have all the equipment ready to do fuel setup calibration test runs on fuel injected engines, configure the mixture/idle setup on all engines, and keep the test/adjustment runs as brief as possible. Also note that Continental has additional flight check requirements for engines equipped with an altitude-compensating fuel pump. Check the magneto timing and drops at the same time.
The break-in flight
Continental has detailed break-in procedures as part of its M-O manual and in Service Information Letter SIL012. For Lycoming, refer to Service Instruction 1427C.
My recommended general guidelines are as follows:
- Ensure that your mechanic has completed the first-start and calibration run-in tests before performing your break-in flight.
- Add oil to the maximum capacity per your aircraft’s pilot’s operating handbook (POH). The recommended oil will most likely be a straight-weight, non-ashless dispersant mineral oil, but many shops are currently recommending multi-weight mineral oils such as Phillips 66 X/C 20W50 (check with your engine manufacturer, overhauler, or cylinder manufacturer). Avoid any oil additives unless specified by the manufacturer/overhauler.
- Avoid break-in flights on especially hot days and keep the aircraft lightly loaded.
- Follow your POH for normal engine start, run-up, and pre-flight checks, minimizing your time on the ground.
- Monitor oil pressure on engine start and maintain checks during the break-in process to ensure it remains in the green.
- Perform a normal, full-power takeoff and climb to a safe altitude that allows the aircraft to reach 75-percent power. This may mean relocating the aircraft from high-altitude airports to a location where this can be safely accomplished.
- Remain within gliding distance of the airport or safe landing terrain in case of an emergency during the break-in period.
- Maintain cruise flight at 75-percent power with a mixture that is rich of peak (ROP) for the first hour of flight. Monitor cylinder head temperatures (CHT) at all times, using mixture, cowl flaps, altitude, and (as a last resort) power reduction to remain between a minimum of degrees Fahrenheit and a maximum of 400 degrees Fahrenheit CHT on all cylinders. The specified limits are 420 degrees Fahrenheit for Continental cylinders and 440 degrees Fahrenheit for Lycoming cylinders, but I strongly recommend trying to remain below 400 degrees Fahrenheit with either engine type.
- Following the first hour of flight, alternate cruise power settings between 65-percent and 75-percent power while maintaining ROP mixture settings.
- Avoid long descents at low power settings during the break-in period.
- After noting stable CHTs that are lower than your initial break-in temps, resume more normal flights while maintaining power settings of 65 percent to 75 percent until oil usage has stabilized.
Post break-in flight
The first flight of your break-in is the most critical, and you should see a notable reduction in CHTs during that process. Following CHT reductions, the most significant sign that the break-in process is complete is the stabilization of oil usage to a point that it is fairly minimal and normal for your engine type. Most cylinders will complete break-in within the first 25 hours, depending on the engine and cylinder type. Nickel cylinders, for example, can break-in in only a few hours, while chrome cylinders can take up to 50 hours to complete the process. Regardless, if you take the time to perform this critical step properly, you’ll have a solid foundation for years of future flying. Until next time, I hope you and your families remain safe and healthy, and I wish you blue skies.