Fair or not, like it or not, your skill at landing an airplane is your most heavily judged piloting task. You might be a great flight planner, a maestro at fuel management, or a whiz at understanding weather, but all that takes a back seat to your competence when rubber meets the runway.
Let’s face it; when you enter the traffic pattern, you’re the main attraction. Passengers will study your every move and silently wonder about the events to come. Some may even voice concerns, especially if it’s windy or turbulent, or if you’re making aggressive crosswind corrections. But this is nothing compared to the scrutiny of your fellow pilots. A flawless performance may not be complimented by this unforgiving crowd, but if you botch it you risk becoming an airport legend. And why is it that there always seem to be so many witnesses to bad landings, but none to view flawless arrivals?
Humor aside, it’s worth emphasizing that most accidents occur in the landing phase of flight. The majority are mishandled crosswind landings, but there are a fair share of overshoots, undershoots, and ground loops. These accidents seldom cause injuries, but they take a tremendous toll in insurance claims—and bruised egos. With all of this in mind, the AOPA Pilot staff takes a look at some of the more prominent landing challenges.

Shorts and softs
With precision for one and finesse for the other
By: Dave Hirschman
| Short field | Soft field |
|---|---|
| • Precise airspeed control. | • Carry power into the flare. |
| • Pre-select touchdown point. | • Touch down gradually. |
| • Eliminate float in ground effect. | • Consider less than full flaps (or no flaps). |
| • Minimum touchdown speed. | • Maximize prop clearance. |
| • Maximum weight on wheels. | • Avoid braking if possible. |
In short-field landings, the goal is to bring the mass of weight consisting of you, your passengers, cargo, and the airplane you came in, to a safe stop in a shorter distance than the runway. The main variables you control as the pilot are the speed at which the mass arrives and its placement on the runway.
Precise airspeed control is critical to successful short-field landings because excess speed means there’s more energy to dissipate in a fixed amount of runway. Some pilots make the mistake of flying a long, slow final approach, then dive for the runway and pick up speed in the final seconds before touching down. There’s no advantage in dragging the airplane in on a slow final approach because the only speed that matters is one at which the airplane touches down.
Also, it’s not necessary or even desirable to fly a steeper approach to a short field since the amount of energy is virtually unchanged. Better to fly a normal angle if conditions permit.
Some backcountry pilots equip their airplanes with angle-of-attack (AOA) indicators that allow them to approach at the same AOA regardless of their airplane’s weight or outside air temperature. Since an airplane stalls at the same critical AOA regardless of aircraft weight or density altitude, knowing the angle can be even more useful than the numbers on the airspeed indicator.
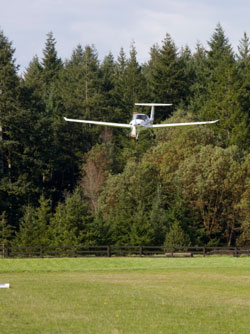 “The AOA indicator takes the guesswork out of it,” said Dick Laumeyer, a retired airline pilot and former U.S. Navy flier who takes his Cessna 185 on hunting trips to remote, mountain airstrips each year. “I used to add a couple knots for the kids and a few more for the cargo, and I was usually too fast. Now, I hardly look at the airspeed indicator anymore.”
Lori MacNichol, founder of Mountain/Canyon Flying Seminars, has been teaching backcountry pilots her own technique, which involves picking an aiming point on the runway, setting the airplane’s attitude, and precisely controlling speed with pitch and rate of descent with power so that the aircraft touches down just beyond the aiming point. By reducing the airplane’s tendency to “float” in ground effect, MacNichol dramatically reduces total landing distance.

Once the airplane is down, pilots can raise the flaps, a move that transfers more weight to the wheels for better braking action. The name of the game for short fields is precision, and not necessarily subtlety or smoothness. Soft-field landings, by contrast, are all about finesse.

The goal is to touch down softly and smoothly, keeping the heavy front end of the airplane as far from the ground as possible for as long as practical. Full flaps are nice, but low-wing airplanes may have ground clearance issues in tall grass or uneven ground. Carry power into the flare, and keep the fan turning even after the main landing gear touch the ground. The goal is to make the airplane’s transition to the ground smooth, gentle, and unhurried. Avoid using brakes since the spongy ground should slow the airplane without mechanical assistance. And when the airplane does slow down, a significant amount of power may be necessary to keep the wheels rolling, so don’t let it get bogged down.
Most pilots only practice short- and soft-field landings on long, paved runways, so it’s purely an academic exercise. It’s helpful to gain real-world experience by landing at actual short or soft runways and seeing how the techniques improve aircraft performance. Proficiency in these specialized skills will open up many more places for future flying adventures.
E-mail the author at [email protected].
Get crossed
The basics of crosswind landings
By: Ian J. Twombly
Before we go any further, let’s establish some basic facts. You need to learn how to land an airplane in a crosswind. Your competency as a pilot will be at least partially judged on this ability. Doing so isn’t at all difficult, and with some basic know-how and instruction, it should be second nature.
Limiting yourself to little or no wind is an impractical way to fly, and it can be unsafe if you find yourself surprised by high wind as you approach your destination airport. And although you may feel comfortable with the wheels skidding sideways across the runway, chances are your passengers will not.
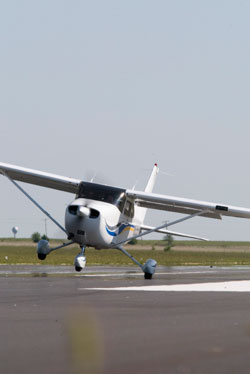 In 2008, the latest year for which detailed data are available, 121 of the 413 landing accidents are directly attributable to wind. That means about one airplane has not an incident, but a full-fledged, NTSB-reported accident every three days. Although they are rarely fatal, landing accidents cause untold ego bruising and insurance payments.
So it’s time to admit that maybe your crosswind skills need some work. The good news is that the theory behind the technique is quite simple and can be applied regardless of the wind’s speed.
First off, forget about crosswind component. Knowing the exact crosswind component is of little consequence. About the only thing it’s good for is knowing whether or not to fly—or, if multiple runways are available, which one to use. When it comes to executing the technique, it’s a useless number.
Properly executing a crosswind landing begins with a stabilized approach. Here you have two choices. You can either feel out the wind direction and gust factor early, and make your passengers a little uncomfortable in the process, or you can fly a normal approach crabbed into the wind. Which you choose is up to you.
When opting for the first method all you need to do is establish a side slip. Apply rudder to keep the nose tracking straight down the extended runway centerline and bank into the wind to avoid drifting. At first you’ll need to think directions. For example, if the wind is from the left, you’ll want right rudder and left bank. It will be the opposite for wind from the right. You’ll be cross-controlled, which is why it’s uncomfortable for passengers, but you’ll also be well established on the approach.
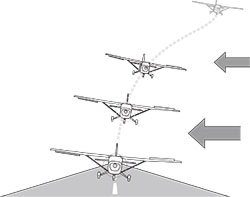 The other method calls for pointing the nose of the airplane into the wind and flying the extended runway centerline. Here the rudder and ailerons are neutral, at least for the purpose of learning the technique. This is no different from flying into the wind at altitude to maintain a specific ground track.
With either method, remember that wind conditions will change as you come down final approach. How much change you’ll experience depends on the wind, the airport, and the airplane. Regardless, it’s up to you to make sure you adjust the airplane appropriately while still out a bit from the runway.
On short final and over the runway, things transition a bit. If you’ve opted to side slip down final, you’re set up for a good landing. The next steps are the roundout and flare, taking out all the power and holding the nose off, with the opposite aileron and rudder still applied.
| Crosswind landing tips |
|---|
|
If you’ve been crabbing down final approach, you’ll need to transition to a slip for landing. With very few exceptions, light airplanes shouldn’t be landed in a crab, which is why employing a slip on final is often easier for beginners. Transitioning to the slip is not hard, however. We often say it’s a matter of “kicking out the crab” and dropping the wing into the wind. In other words, if the nose is pointed left, we’ll kick right rudder and drop the left wing. The beauty of the technique is that, like landings with no wind, there’s an element of finesse to it. How hard to push on the rudder and how much aileron to apply both depend on how much wind there is.
Once you get the hang of it, it becomes second nature to simply keep your nose aligned with the runway centerline with rudder, and maintain the airplane’s position on that centerline with aileron. If you get very good, chances are you’ll be able to easily handle the maximum demonstrated crosswind component of the airplane.
Another thing to remember is that this technique must be applied beginning with only the slightest hint of a crosswind, and is limited only by the travel of the rudder and the wing clearance on the runway.
E-mail the author at [email protected].
Cracking the code
‘I’d just, you know, land’
By: Dave Hirschman
The leathery, grey-haired aviator held court on a summer evening as we younger and far less experienced fliers quizzed him about some of the aircraft he had flown.
A question came up about the Cessna L-19 Bird Dog. Had the old man ever flown one?
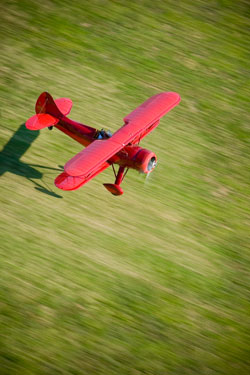 Why, sure. It turned out he had logged many hundreds of eventful hours in Bird Dogs towing gliders over Hawaii. As an aspiring tailwheel flier, I asked a question designed to steer him into the endless briar-patch debate about the virtues of three-point versus wheel landings. Bird Dogs are notorious for their bouncy spring-steel gear, so I wanted to know his preferred method for landing such an airplane.
He thought for a time, made a pained face, and then shrugged.
“I honestly don’t remember, son,” he confessed. “When I turned one glider loose, I’d go back to the airport as quick as I could to get another. When I got to the runway, I’d just, you know, land.”
That answer seemed wholly unsatisfactory. Wheel landings are totally different from three-pointers, and most tailwheel airplanes—and most pilots—favor one kind or the other. It seemed inconceivable that this oldster could have made hundreds, maybe thousands, of landings in the same kind of airplane at the same location without developing a habit or preference for one or the other.
But looking back, his answer makes sense. He simply meant that he adjusted his landings to fit conditions. If he needed to land short, he’d slow his approach and make a three-point landing. If he was on a narrow strip and wanted to preserve forward visibility, he’d touch down on the mains. Being proficient at both gave him the flexibility to “just land” without over-thinking.
My own breakthrough at tailwheel landings came in a Cessna 170, a close civilian cousin to the Bird Dog, on a summer day in Memphis. I had been going around and around the pattern at my local airport trying—and failing—to “pin” the mains to the ground on wheel-landing attempts. Things would go just fine until I was one or two feet off the surface. Then I’d get ready to decisively add forward pressure to pin the mains on. But as soon as I tried, I’d bounce back into the air.
The more I pushed, the bigger the bounces got. Eventually, I’d admit defeat, add power, and go around. Three-point landings were no problem.
I finally put the airplane away after leaving an inordinate amount of rubber on the pavement. Frustrated, sweaty, and miffed by my inability to gracefully land the slow-moving Cessna, I stubbornly resolved to keep trying. But I needed a Coke first and went inside the airport’s FBO to retrieve one.
The old guy had been watching, and he followed me to the vending machine. There, he asked if I wanted him to share the secret of wheel landings. Of course!
He stood close and softly said: “Don’t land.”
I stared back blankly.
| Tailwheel landing tips |
|---|
|
But what about the forward stick? Don’t I need to be ready to push at just the right instant? If I wait a fraction of a second too long, won’t I miss my chance? The old man shook his head.
“As long as you’re working the stick aft when the wheels touch, your descent rate will be next to nothing, and the mains will just roll on,” he said. “You’ll have all day to add forward stick. But if you anticipate the landing, then you’re relaxing the back-pressure too soon, and that’ll cause a bounce every time. As you’ve already seen, once the bouncing starts, it just gets worse.”
The old man’s advice cracked the code, and I started consistently making smooth wheel landings soon after. As long as I thought about flying, the landings went fine. The second I thought about landing, the mains touched too hard, the tail sank, the angle of attack increased, and I was airborne again.
To this day, whenever on final approach, I go through the same act of conscious self-deception by trying to convince myself that I intend to fly the full length of the runway one foot off the ground. When the mains eventually touch, I savor the surprise and accept the generous old man’s gift all over again.
E-mail the author at [email protected].
Steady as she goes
On speed, on glide path—no surprises
By: Thomas A. Horne
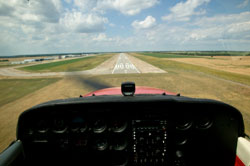 Good approaches make good landings, the saying goes. And it’s true. What pilots need are pattern procedures that are built around a defined sequence of events located at predetermined locations in the traffic pattern. The goal: a gradually descending approach through the base and final legs, in configurations consistent with conditions, and with gradual power reductions. In the end, you wind up over the numbers, on speed, and with the right amount of power and control deflections to counter any crosswinds.
To reach this goal, you need to come up with tried-and-true configuration targets. Abeam the numbers on downwind, common targets for pilots of complex piston singles, for example, include reducing power to 15 inches or so of manifold pressure, lowering the landing gear, then selecting the first notch of flaps. The result is usually an airspeed somewhere around 90 knots. Down the base leg, power can be dialed back and more flaps added—depending, of course, on your distance from the runway, your altitude, and wind conditions.
This kind of procedural standardization becomes more critical on final. That’s when you want to nail a target airspeed and vertical path—again, using target power settings and configurations—to ensure a steady descent rate. Ideally, you don’t want your airspeed lower than your target, and no higher than five or 10 knots above it. Your descent rate should be somewhere around 500 to 600 fpm; check any VASI, PAPI, or other glidepath guidance for confirmation of a safe descent angle. Of course, gusty conditions can make you work harder at meeting these goals, but the principal idea remains: Don’t let yourself get too low or too slow.
| Stabilized approach tips |
|---|
|
Sometimes I think those who advise “winging it” down final are too clever by half. To them, a stabilized approach is the kind flown in a B-52. You know, a 10-mile final with full flaps and all powered up, preparing for an arrival at a 10,000-foot-long runway. But stabilized approaches can be tailored to match the optimal approach profiles for any airplane.
All I can say is that without a recipe for consistent patterns your risks go up, no matter what you fly. That’s why the professionally trained crews of turbine-powered airplanes are taught to fly stabilized approaches day in and day out. Ditto the military. Why is that? So that every approach to every runway is consistent.
It’s no secret that those new to turbine flying—especially light business jets—are well represented in landing accidents. That’s because they get too fast on final and run off the end of the runway. Why? Usually because they flew faster than their target reference speed on final, then floated way down the runway. Many piston-single pilots get into the same kind of trouble, for the same reason.
Stabilized approaches are the way to go. That’s especially true when flying instrument approaches. At the final approach fix, go to your predetermined power and configuration settings to get a nice, controlled descent rate and speed. Now you’re free to concentrate on tracking the inbound course, all the while monitoring vertical progress.
Want to drive down final at warp speed, chop the power, and dive for the runway? Go ahead. Maybe you’re airshow material. As for me—and most other pilots—I’ll take predictability over a nasty surprise.
E-mail the author at [email protected].
Stabilize this!
Don’t fly like an old jet
By: Dave Hirschman
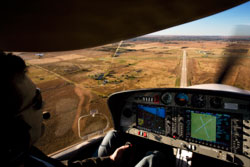 If you’re behind the wheel of a Mazda Miata, pretending you’re driving a tractor-trailer rig doesn’t make you a more skillful or conscientious driver. Yet if you’re flying a Piper Arrow, some of your fellow pilots (and flight instructors) would have you believe that adhering to procedures developed a half-century ago for Jurassic jets with far different flying characteristics is the mark of a real pro. The “stabilized approach,” a mantra for so many of today’s GA pilots and instructors, sounds like a good thing—but a little history helps decode the term.
The stabilized approach was mandated in the early 1960s for airline crews operating heavy, multiengine, swept-wing transports with turbojet engines that had notoriously slow spool-up times. It could take 10 seconds or more for these axial-flow engines to go from idle thrust to full power, and a spate of horrendous accidents resulted when pilots accustomed to quick-reacting piston engines (attached to propellers) found themselves low and slow in big jets. Stabilized approaches have been universally adopted by airlines with great success. If they’re not in landing configuration with power and trim set and on speed with a precise rate of descent at a certain altitude (usually 500 or 1,000 feet agl), they go around. It’s the right thing to do.
But if you’re flying a light GA piston aircraft, stabilized approaches can be a menace.
First, they require long, slow final approaches with the gear down and full flaps. The high-drag configuration on a 3-degree glideslope means there’s virtually no chance of gliding to the runway in case of an engine failure. And dragging the airplane in on a slow, time-consuming final approach makes you a hazard to faster airplanes that may be behind you, as well as other aircraft in the airport traffic pattern that may turn base in front of you—or have to extend downwind to avoid you.
| Not-so-stabilized approach tips |
|---|
|
In IFR conditions, a Cessna 172 pilot who drops full flaps at the final approach fix and crawls to the threshold at 70 knots is performing the aviation equivalent of driving 55 mph in the left lane on the expressway. It’s legal, but not smart or considerate.
For sport airplanes (Pitts, Stearman, Cub, et cetera), constantly turning, decelerating, and sometimes slipping, “unstable” approaches are more than just preferable—they’re a near necessity. Such patterns avoid long, straight-in finals where the lack of forward visibility in these airplanes can prevent pilots from seeing the landing area at all. In light, single-engine GA piston airplanes, few things are more important than preserving the ability to glide to a safe landing and maintaining an unobstructed view of the runway.
By blindly adhering to stabilized approach procedures developed long ago, for aircraft with far different flying qualities, GA pilots create the illusion of improved safety without the reality of it.
E-mail the author at [email protected].


