Aircraft maintenance: Tips to clean your engine compartment
A&P Jeff Simon walks you through part 3 of cleaning your aircraft
In our last segment, we discussed preparation and protection of the aircraft’s exterior surface. But, that’s not all there is to cleaning an aircraft. We still have the engine and interior to clean. Today, let’s talk engine cleaning.
Engine cleaning
 I’ll begin by issuing a strong warning: There are a lot of ways to cause serious problems when attempting to clean an aircraft engine and cowl. So, start with the most important step, which is to answer what you are trying to accomplish.
If your goal is to have things look nice when you open the cowl, then you can accomplish a surprising amount by simply using a pair of gloves, eye protection, and a rag soaked in 100LL (or Varsol). Wipe down everything you can reach and then use a dry rag to finish the job.
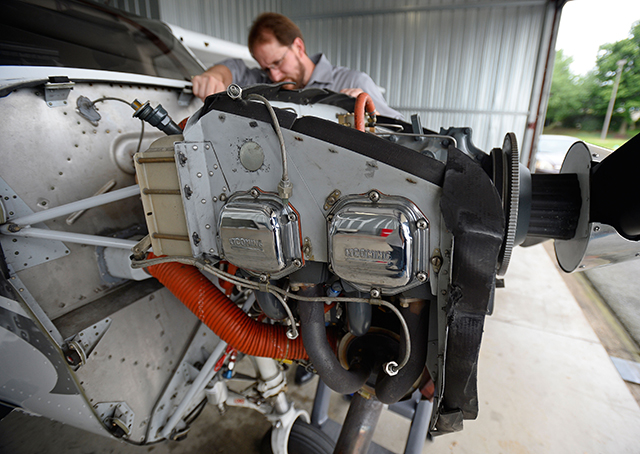
If your goal is to get a more thorough cleaning of the entire engine and compartment prior to inspection or maintenance, we need to take a more disciplined approach. That begins with protecting the vulnerable parts of the engine from damage. There are many different components within an engine cowl that you do not want water or cleaning chemicals coming in contact with:
- Electrical components, connectors, fuses, and bus bars—These items need to be well protected. It’s fairly easy to introduce electrical gremlins by spraying water and chemicals willy-nilly around these components; plus, a strong spray of water can pull a wire or connector out of place.
- Alternators and starters—The electrical components of these are typically vented to assist in cooling. Those vents are excellent paths for water and cleaning agents. There are also sensitive bearings inside to watch out for.
- Vacuum pumps—The typical general aviation dry vacuum pump must remain dry in order to function properly. Lubrication relies on dry carbon from the pump vanes to assist in smooth sliding of the vanes in the hub slots. Normally, the exhaust port on the pump is well protected from water, oil, or other foreign materials. One shot of water up that tube can ruin you day, and it may take some time before the failure surfaces.
- Breather tubes, fuel system vents, fuel injectors, and air intakes—Carefully protect all paths that air is supposed to flow to and from the engine. Filters should be protected as well, because many of them rely on oils that are impregnated into the material to catch dust and dirt.
- Hinges, bushings, and bearings—Your goal may be to remove excess oil from the outside of the crankcase or oil pan, but there are a lot of other components around that need their lubricating grease and oil left intact. So, don’t just spray solvent everywhere possible. Be very targeted in your application.
Cleaning
Everything that can be cleaned manually, should be. Only spray chemicals (such as Varsol) under low pressure as needed and rinse in the same manner. Using high pressure is a recipe for disaster. Electrical components should be cleaned with contact cleaner. Aircraft-approved solvents or cleaners should be used for everything else. A good set of bottle brushes can be ideal for getting into tight spaces.
Post-Cleaning Lubrication
No matter how careful you are, it’s likely that some component lost a little of its lubricant during the cleaning process. Even if that isn’t the case, this is an excellent opportunity to go through the entire engine compartment and properly lubricate all of the components listed on the aircraft’s lubrication chart (You have a copy of that, right?).
Finally, dry the engine and be sure to conduct a careful post-cleaning inspection and thorough run-up. Rushing to fly as a method of drying things out is a good way to wind up in a field somewhere far from home. So, please be very careful when performing engine cleaning. There are too many examples around of good intentions resulting in bad outcomes.
Next time, we will discuss the last step in our cleaning process: the aircraft interior. Until then, happy flying!
Interested in aircraft maintenance? View the archives of Jeff Simon's Aircraft Maintenance series.
![]() Jeff Simon is an A&P mechanic, pilot, and aircraft owner. He has spent the last 14 years promoting owner-assisted aircraft maintenance as a columnist for several major aviation publications and through his how-to DVD series: The Educated Owner. Jeff is also the creator of SocialFlight, the free mobile app and website that maps over 20,000 aviation events, airport restaurants, and educational aviation videos, including many how-to videos for the subjects of these articles. Free apps are available for iPhone, iPad and Android, and on the Web at www.SocialFlight.com.
Jeff Simon is an A&P mechanic, pilot, and aircraft owner. He has spent the last 14 years promoting owner-assisted aircraft maintenance as a columnist for several major aviation publications and through his how-to DVD series: The Educated Owner. Jeff is also the creator of SocialFlight, the free mobile app and website that maps over 20,000 aviation events, airport restaurants, and educational aviation videos, including many how-to videos for the subjects of these articles. Free apps are available for iPhone, iPad and Android, and on the Web at www.SocialFlight.com.