An airplane is cleared to taxi to Runway 33 and hold short for landing traffic. The taxiway markings and associated infrastructure the pilot will rely on to remain safely clear of the runway are located just beyond the point where the parallel taxiway turns 90 degrees toward the threshold.
What do those pavement markings look like? What’s their color? What associated infrastructure is collocated with them?
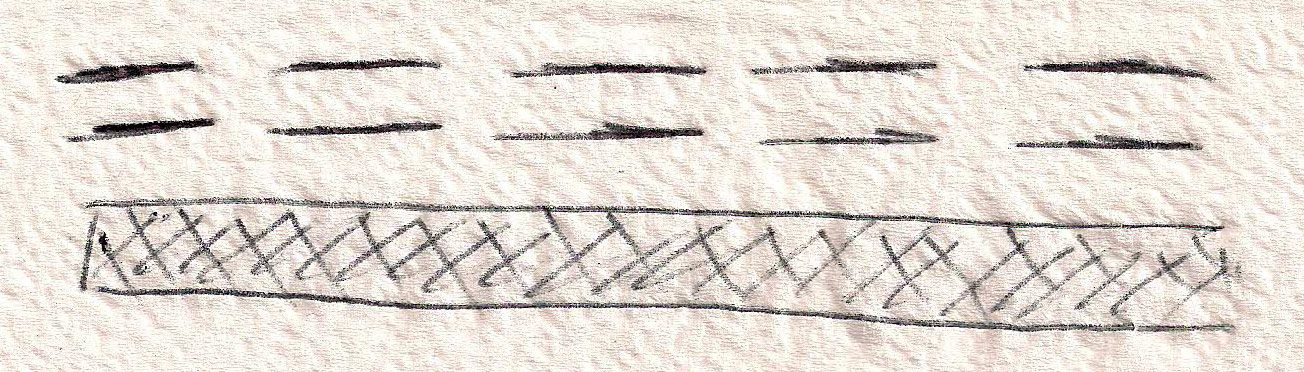
Make learning the answers to such questions stick by sketching out the items, then comparing your drawings to published illustrations.
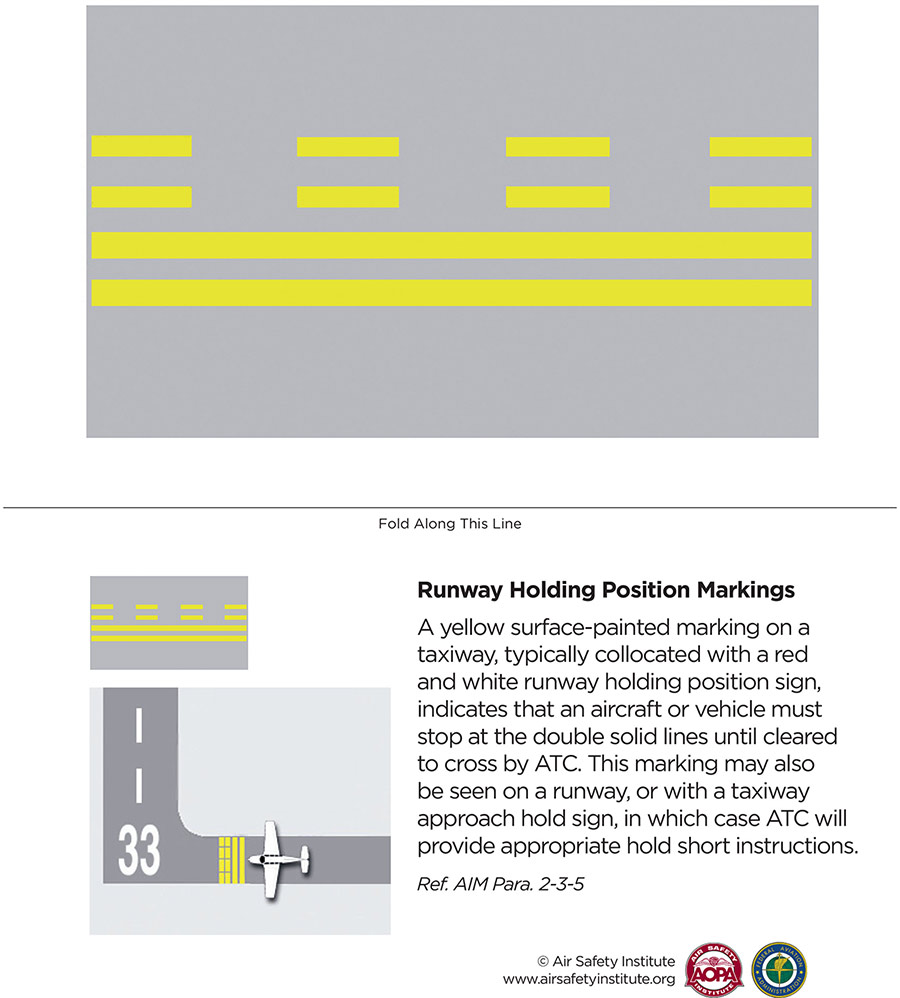
Runway holding position markings combine solid and dashed lines indicating where an aircraft should stop. Can you draw the markings from memory?
The lines, painted on the taxiway in yellow, are doubled. When a rusty pilot was asked to sketch the markings without first peeking at Aeronautical Information Manual Section 2-3-5, he got the basic idea right, but drew only a single dashed line and a single solid line (which actually depicts a movement area boundary marking). After reviewing the AOPA Air Safety Institute’s Runway Safety Flash Card of the markings, the pilot’s recall will likely be accurate next time.
The flash card explains that “a yellow surface-painted marking on a taxiway, typically collocated with a red and white runway holding position sign, indicates that an aircraft or vehicle must stop at the double solid lines until cleared to cross by ATC. This marking may also be seen on a runway, or with a taxiway approach hold sign, in which case ATC will provide appropriate hold short instructions.”
Drawing this marking is the task posed by an open-book question on the Air Safety Institute’s sample pre-solo written test. Another sketching task calls for illustrating an airport traffic pattern, and labeling each leg, and the correct entry and departure points.
Have you ever sketched a graph of your aircraft’s power curve?
That interesting exercise teaches the relationship between level-flight power settings and indicated airspeeds—and helps you remember what speed you get for a given rpm setting (for a single-engine trainer with a fixed-pitch propeller).
Sketches can illustrate intercept-and-track procedures for VOR navigation; depict a wing’s angle of attack; highlight wind’s effect on a ground-reference maneuver, and more.
Tradition aside, there is no requirement that you make the sketch for your instructor on a napkin in the airport coffee shop. But here’s a tip if you do: Napkin sketches work best in pen, not pencil.


