Aircraft Maintenance: Understanding and inspecting flight control cables
Most general aviation aircraft control systems include flexible steel cables, otherwise known as wire rope. The cables can be manufactured from galvanized steel or stainless steel alloy, depending on the specs from the aircraft manufacturer. The most common aircraft cable diameters are 1/16 through 5/32 with 7x7 or 7x19 construction.
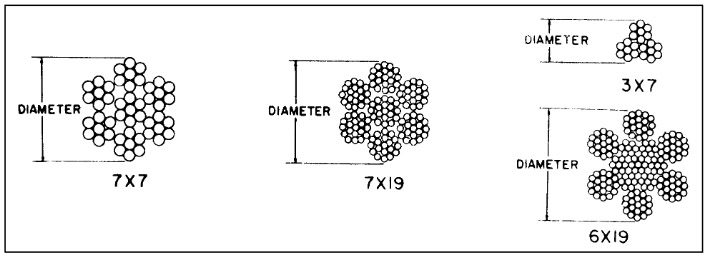
The most common control cable sizes (depending on strength required) are 7x7 and 7x19 cables. A 7x7 cable consists of six strands of seven wires each, laid around a center strand of seven wires. A 7x19 cable has an additional layer of 12 wires laid over the 7x7 in the opposite direction.
Aircraft cables live in fairly harsh environments with temperature changes and exposure to the elements. They are subject to wear and deterioration and remain in static positions around pulley bends for extended periods of time while the aircraft sits. Sadly, most control system cables in the GA fleet are original to the aircraft and have remained in service for far longer than their intended design life.
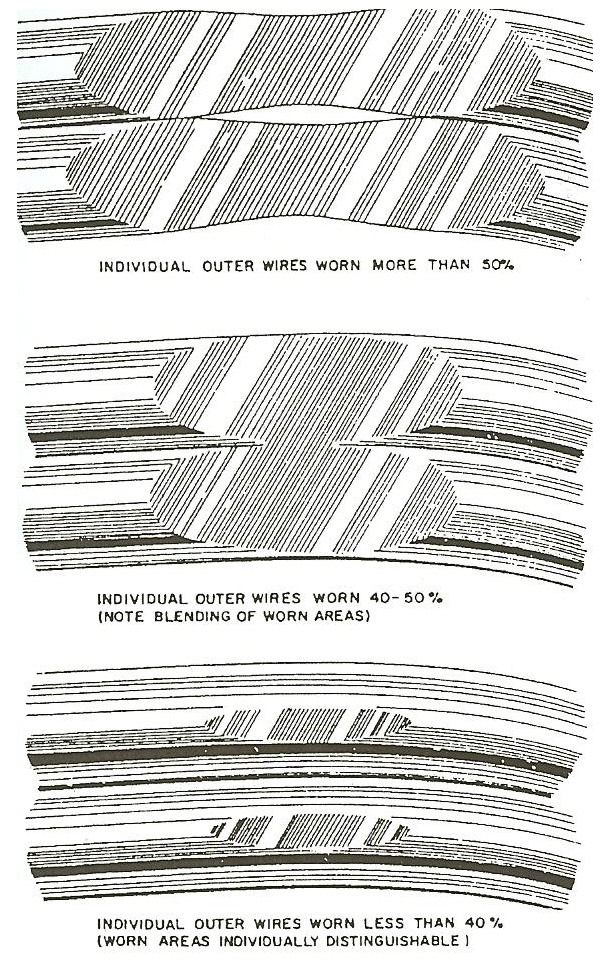 At every annual or 100-hour inspection, all control cables must be inspected for broken wire strands. The easiest way to check for exposed strands of broken wire on a cable is to have one person move the cable through its length of travel while another person holds a cotton cloth gently around the wire looking for places that the cable snags the wire. This must be done along the entire length of the accessible cable (although issues are most likely near pulleys and guides).
Any cable assembly that has even a single broken wire strand located in a critical fatigue area must be replaced. Per the FAA guidance, a critical fatigue area is defined as the working length of a cable where the cable runs over, under, or around a pulley, sleeve or through a fair-lead; or any section where the cable is flexed, rubbed, or worked in any manner; or any point within one foot of a swaged-on fitting.
This process is generally OK for identifying external cable damage. However, cables also fail from the inside out due to environmental deterioration, distortion, fatigue, and wear. The only way to accurately inspect cables for internal damage is to remove the cables from the aircraft and flex them manually while inspecting them under a magnifying glass for damage. Since the labor to remove, install, and rig aircraft cables is generally higher than the cost of the cable itself, it generally makes sense just to replace your control cables on a regular basis, such as every 15 years. For tailwheel aircraft, I would personally recommend replacing the rudder/tailwheel cables every 5 years due to the high stress and risks associated with control system failures.
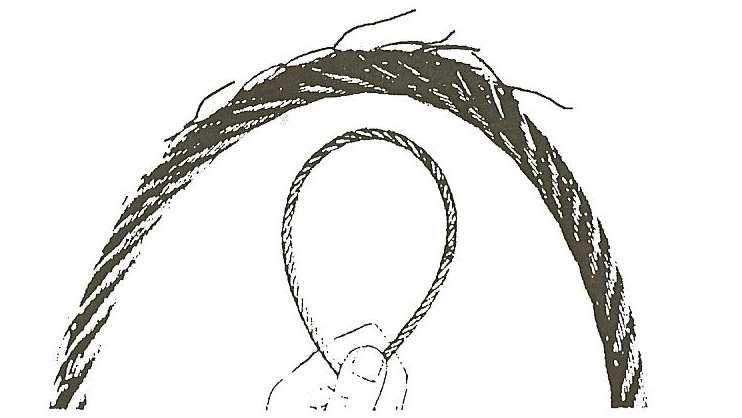
The preventive removal, inspection, and replacement of aircraft control cables is a controversial subject in many circles due to the cost involved. However, I have personally witnessed several instances of control cable failures in aircraft that remained in service with the original control cables for over 30 years. I have seen cables that looked quite good externally, but which literally disintegrated upon removal and flexing, revealing complete failure of the internal strands.
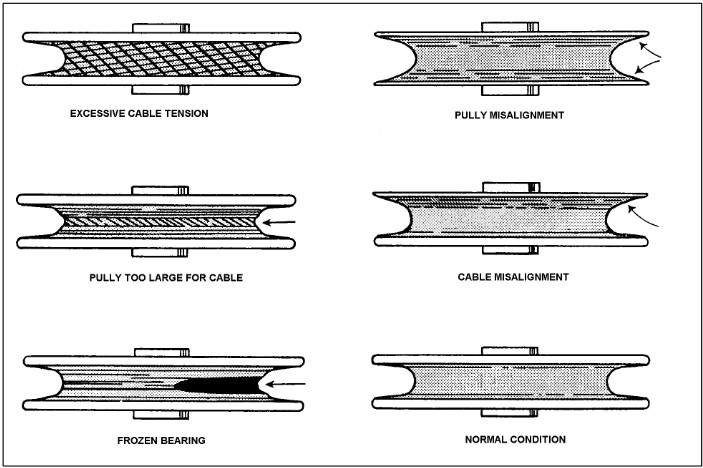
During your inspection, it’s also important to inspect and rotate the pulleys. Rotating the pulleys allows you to check the wear and functioning of the bearings. The wear pattern on the pulley can tell you if the bearing is frozen or if the pulley is misaligned. You should also lubricate the pulleys and cables per the manufacturer’s specifications (if applicable).
The bottom line is that it’s simply not worth the risk to keep flying with 30-plus-year-old cables that have exceeded their design service life. Inspect them carefully at annual, along with the pulleys. Personally, I recommend implementing an incremental replacement process that will ensure that, in some reasonable amount of time, all control cables that may be original to the aircraft get replaced. Start with the most critical systems and replace one cable system at a time (such as the elevator cables) as your budget allows.
These are the most critical systems on your aircraft. You can be the best trained pilot in the world, but without any controls, you’re just a passenger. Happy flying!
