Under the hood
Your introduction to instrument flying


Available in various forms, from homemade visors crafted of milk jugs to strategically frosted safety glasses, these training tools block the view of the outside world, enabling pilots to practice flying entirely by reference to their instrument panel. In doing so, they learn life-saving skills that can help extract them from inadvertent encounters with instrument meteorological conditions (IMC) and perhaps lay the foundation for their pursuit of an instrument rating once their private pilot certificate has been earned.
Hood work, as it’s termed, comprises a small portion of primary flight training, which mostly uses visual (outside) references. Most beginner pilots tend to focus on instrument indications during their initial learning, since they’re being encouraged to hold a specific performance airspeed in climbs and glides, maintain bank angle when turning, and keep their altitude within limits during level flight. Oftentimes, instructors have to pry the student’s eyes away from the instrument panel and encourage them to use visual attitude references for their flying. This is critically important, of course, since traffic avoidance and orientation require external vigilance.
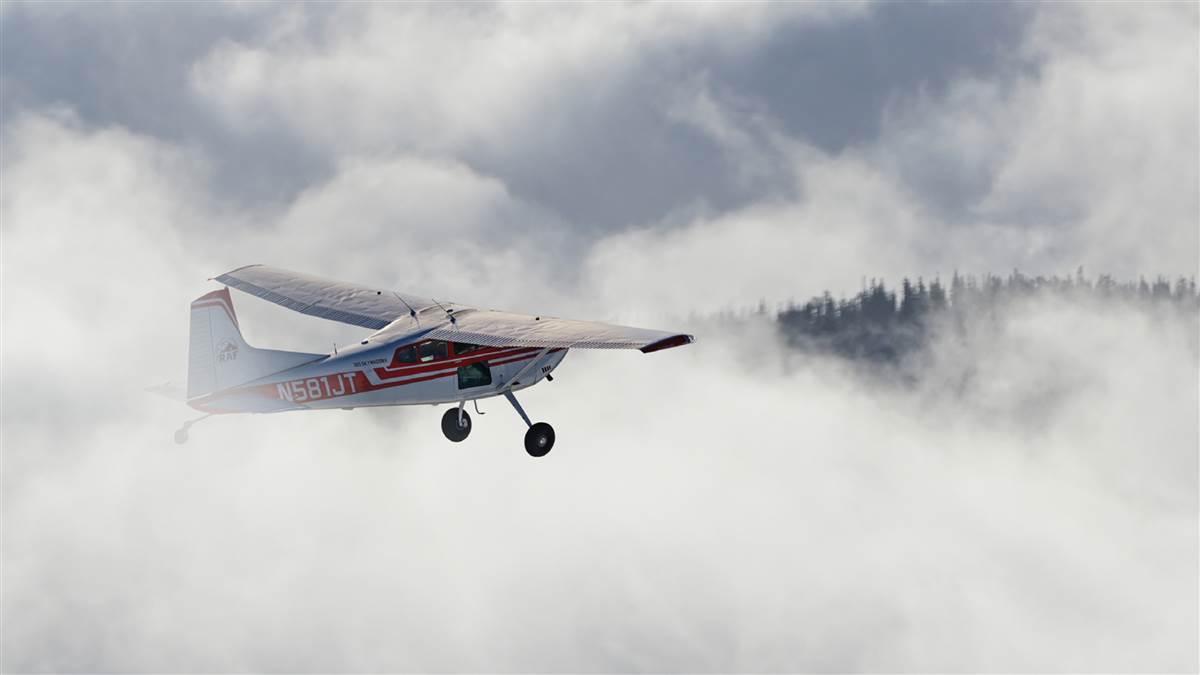
However, there may come a time when visual flying becomes difficult or impossible. Survival will only be achievable by emergency use of the instrument references found in most general aviation airplanes. During their introduction to instrument flight, pilots learn that relying on physical feelings, sounds, and pressures is impossible. Only by focusing on the indications on the panel in front of them, blocking out internal temptation, will it be possible to maintain control.

About 70 years ago, AOPA developed a “180-Degree Rating” emergency instrument flying course that was designed to save the lives of VFR pilots trapped in weather by employing basic wing-leveling skills. These skills helped pilots avoid the loss of control that inevitably followed attempted visual flying in clouds. If a pilot could simply negotiate a turn to a reciprocal heading that would lead them back into good weather, they could live to fly again another day. It worked, and soon flying “under the hood” was integrated into basic flight training as well as safety refresher courses.
FAR 61.109(a) requires a minimum of three hours of instrument training as part of the curriculum leading to the private pilot checkride. It’s best to limit the “hood flying” to 20-minute sessions throughout the syllabus, interspersed with breaks of visual flight. As tolerance for wearing a view-limiting gadget grows, longer periods can be endured. Rather than adhere to a predetermined schedule, the CFI should continually evaluate the student’s adaptation to instrument flying and reduce or extend hood time as appropriate.
Compared to mechanical instruments, a glass cockpit presentation is more intuitive and easier to use as a reference for maneuvers previously flown visually, since all elements of flight control are located directly in front of the pilot. Even the logically arranged “six pack” of analog gauges that was introduced in the mid-1960s requires considerably more eye movement and consequent head-rocking than the integrated digital display.

Teaching methods
However presented, the concept of primary and supporting instruments or elements must be introduced at the outset. In attitude instrument flying, where the outside world is brought inside to be visualized on the panel, the attitude indicator (artificial horizon) is usually a primary reference that needs to be checked for deviation once every second or so. Meanwhile, the appropriate supporting indications, derived from the heading indicator, airspeed indicator, altimeter, or vertical speed indicator (VSI), will be checked between glances at the attitude presentation.
A similar method, termed “control and performance” in the FAA’s Instrument Flying Handbook, mimics the visual-flying foundation of “attitude-plus-power-equals-performance.” Establishing the correct attitude, usually with the attitude indicator, and power setting, shown on the tachometer or manifold pressure gauge, provides the control that results in desired performance. Scanning, or cross-checking, verifies performance by referring to instruments that show airspeed, altitude, vertical rate, or turn rate. In any case, the attitude indicator is the center of control.
Instrument scanning is an art that must be learned, even when using the more compact presentation of a primary flight display. The student needs to avoid lengthy staring at the attitude indicator—or, worse, at a supporting instrument—a fixation that allows another deviation to go unnoticed. The key is to glance at the artificial horizon just long enough to note pitch and bank indications and make any needed correction, then look at supporting instruments that present desired parameters. In straight and level flight, that will be the heading indicator and altimeter. After checking heading, the pilot should go back to the attitude indicator and, if heading had deviated, make a bank input to return to the course. While that correction takes effect, one checks the altimeter, the other supporting instrument, to see if it’s still stable or needs correction. Then, scan back to the attitude indicator to make sure pitch and bank are on target, after which heading is confirmed, and attitude is given a glance before again looking at the altimeter.
This constant scan should be performed as if following the spokes of a wheel back toward its hub, which is the attitude indicator, with imagined spokes leading out to the supporting instruments. Between checking for deviations at the supporting instrument indications, the aircraft’s attitude is confirmed, at the hub of the wheel, before looking at another supporting indication—in, out, in, out, in—until the scan becomes routine.

Maneuvering by instruments
When initiating a turn, the proper direction of turning is confirmed by looking at the heading indicator, then a standard instrument turn is established with the attitude indicator’s bank index, while holding pitch level. To confirm that the correct bank angle is being used, depending on airspeed, one can look at the rate-of-turn indication on the turn-and-slip instrument. Altitude is rechecked, then attitude confirmed stable, and a glance taken at the heading indicator’s progress toward the target rollout number. As the desired heading approaches, attitude is returned to straight flight, after which the heading indicator is checked for accuracy.
To enter a climb, a proper pitch attitude is first established, followed by a power adjustment to climb power. Then, heading is checked for response to the increased P-factor, after which attitude is verified correct before noting the airspeed decreasing toward the correct climb speed. Going back to attitude for bank and pitch-up information, it’s time to look at heading for deviation and airspeed for stabilization, our two supporting instruments at present. Every few scans, altitude is noted for progress toward the target number. As level-off approaches, pitch is lowered on the attitude indicator, heading is consulted, altimeter again becomes a supporting instrument, replacing the airspeed indicator that was supporting during climb. Power is readjusted after airspeed has returned to level cruise indication.
Descent is similar, but with power reduced first, causing the pitch attitude to move down as a normal response to trim, assuming cruise speed is to be retained. The attitude indicator remains the hub of the scan pattern, with heading and VSI used as supporting instruments. Altimeter readings are included at frequent intervals. As the level-off point is approached, power is restored to cruise setting, and pitch attitude is returned to level flight, scanning the heading for deviation.
As proficiency is gained with the basic elements of flying on instruments, students need to be challenged with orientation and navigation tasks, as would be the case if they were trapped in bad weather and needed to fly toward VFR conditions while maintaining control of the aircraft. Selecting a destination from the GPS database, dialing a VOR frequency, and listening to an ASOS broadcast—these are all worthwhile, realistic additions to the workload of keeping the aircraft under control.
Recovery from encounters with spatial disorientation is a vital part of instrument training, much akin to stall recognition and recovery taught during visual flight. At some point, an inexperienced pilot forced to rely on instrument references after entering clouds is likely to lose their sense of level and turning. Getting the airplane back to even keel takes concentration on what the instruments are saying and how to make the aircraft respond.
The time-honored teaching technique is for the instructor to take control, have the student look down at their lap or close their eyes, and fly the airplane slowly into a diving spiral or a nose-high condition approaching a stall. After reaching the out-of-control attitude, the instructor commands the student to look up and take control, which requires them to interpret what the attitude and other indications are telling them, and recover into straight and level flight with appropriate use of power and flight controls.
If the attitude indicator is showing a nose-high condition, it would be logical to expect the airspeed indication to be decreasing, so lowering the nose to the horizon reference must be accompanied with added power. Conversely, if the nose is far below the horizon, airspeed is probably building rapidly, necessitating that power be reduced to idle until speed stabilizes after pitch attitude is placed in level flight. Before pitching up, the wings must be rolled into level attitude with coordinated rudder and aileron use. Common errors are failure to level the wings, over-control of pitch attitude, and lack of throttle adjustment.
Variations on teaching unusual attitude recovery include entering a turn while the student is not looking at the instruments, then slowly rolling out of the turn and even continuing the roll into an opposite bank. This induces a false sense of turning in the original direction, making the assumption of control and recovery by instruments more difficult. Another realistic scenario is for the instructor to maneuver the airplane into a diving spiral, then pull up to nose-high decelerating condition, at which point the student takes over, with confusing internal inputs.
It is also useful to have the student continue to attempt to fly the aircraft while their head is down, stopping any turn they feel developing or bringing the nose up or down to stay level. In a minute or two, the airplane will have unknowingly departed into a developing hazardous condition, usually a gradually increasing spiral dive, at which point the student is instructed to look up at the instrument panel and recover. The importance of relying on instrument flying skills in non-VFR conditions will be apparent.
Early and integrated instruction in instrument flying technique is, like other emergency management skills, a vital part of learning to fly. If the student chooses to continue advancement later on by pursuing an instrument rating, the foundation has been laid.
LeRoy Cook is an airline transport pilot and CFI.
Related Articles


